
No products in the cart.
Cricut Tutorials
How to Use SVG Files with Cricut (Step-by-Step Guide)
04
Mar
Mar
How to Use SVG Files with Cricut (Step-by-Step Guide)
If you are new to Cricut crafting, you’ve probably downloaded an SVG file and wondered how to use it.
**SVG files are one of the most popular formats for Cricut machines** because they allow clean cuts, scalable designs, and professional results.
In this beginner guide, you will learn **how to upload SVG files to Cricut Design Space** and create projects like T-shirts, mugs, decals, and home décor.
What Is an SVG File?
SVG stands for Scalable Vector Graphics. Unlike PNG or JPG images, SVG files are made from vector paths instead of pixels. This means they can be resized without losing quality.
SVG files are perfect for Cricut because they allow the machine to follow the design paths precisely when cutting materials such as vinyl, paper, or heat transfer vinyl.
Most SVG downloads include several file types such as:
SVG (best for Cricut and Silhouette)
PNG (transparent background image)
DXF (used with some cutting machines)
EPS (vector editing software)
For Cricut users, the SVG file is the one you should upload.
Why SVG Files Are Best for Cricut
Using SVG files gives you several advantages compared to standard images:
Clean and accurate cuts
Designs can be resized without losing quality
Multi-layer designs for different colors
Faster workflow in Cricut Design Space
This is why most Cricut users prefer downloading SVG bundles or individual SVG designs for their projects.
How to Upload SVG Files to Cricut Design Space
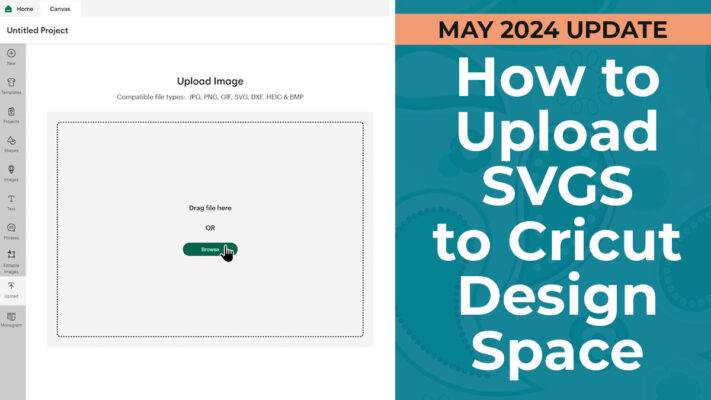
Follow these simple steps to upload your SVG file.
Step 1: Open Cricut Design Space
First, open Cricut Design Space on your computer or tablet and start a new project.
Click the Upload button located on the left side of the screen.
Step 2: Upload the SVG File
Click Upload Image and choose the SVG file from your computer.
Unlike PNG or JPG files, Cricut will automatically recognize SVG files as vector designs and will not ask you to clean up the image.
Click Upload to add the file to your design library.
Step 3: Add the Design to Your Canvas
Once the file is uploaded, select it and click Add to Canvas.
The design will now appear on your project workspace.
You can resize, rotate, or move the design anywhere on the canvas.
Step 4: Prepare the Design for Cutting
Before cutting, check that:
Each layer is separated correctly
Colors represent different materials
The design fits your material size
If your SVG contains multiple colors, Cricut Design Space will automatically separate them into different cutting layers.
Step 5: Click “Make It”
Once everything looks good, click Make It.
Cricut will arrange the layers on cutting mats and guide you through the cutting process.
Load your material into the Cricut machine, press the start button, and the machine will begin cutting the design.
Popular Cricut Projects Using SVG Files
SVG files can be used for many different crafting projects, including:
T-shirts – using heat transfer vinyl (HTV)
Mugs and tumblers – using permanent vinyl
Wall decals – decorative home designs
Stickers – printed and cut designs
Greeting cards – layered paper designs
Because SVG files are flexible and scalable, they are perfect for both small craft projects and professional handmade products.
Where to Download High-Quality SVG Files
If you are looking for ready-to-use SVG designs for Cricut, you can browse a wide collection of high-quality designs at SVGBamboo.
Here are some popular SVG categories you can explore:
Cricut crafting projects
All files are designed for easy cutting and are compatible with Cricut Design Space.
Tips for Working with SVG Files
To get the best results when working with SVG files, keep these tips in mind:
Use high-quality SVG files from trusted sources
Keep designs simple if you are a beginner
Always mirror the design when cutting HTV for shirts
Test cut your material before large projects
Organize your SVG files in folders for easier access
Following these tips will make your Cricut projects smoother and more enjoyable.
Final Thoughts
SVG files make Cricut crafting easier and more creative. Once you learn how to upload and use SVG designs in Cricut Design Space, you can create countless projects including shirts, decals, gifts, and home decorations.
Whether you are crafting for fun or starting a small business, SVG designs open the door to endless creative possibilities.
If you are ready to start crafting, explore a wide collection of SVG designs for Cricut and find the perfect design for your next project.
